




How to install a fireproof ceiling in a garage?
Oct 07, 2025
Leave a message
Hey there! As a supplier of fireproof ceilings, I've seen firsthand how important it is to have a safe and secure garage. A fireproof ceiling not only protects your garage from potential fires but also adds an extra layer of safety to your home. In this blog post, I'll walk you through the steps of installing a fireproof ceiling in your garage. Let's get started!
Step 1: Gather Your Materials
Before you begin the installation process, you'll need to gather all the necessary materials. Here's a list of what you'll need:
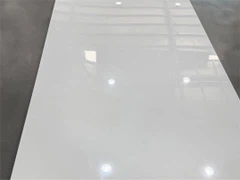
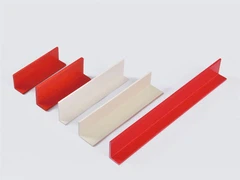
- Fireproof Ceiling Panels: You can choose from a variety of fireproof ceiling panels, such as Flame Retardant Ceiling, GFK Antibacterial Board, or GRP Ceiling. Make sure to select panels that are suitable for your garage's size and layout.
- Measuring Tape: You'll need a measuring tape to measure the dimensions of your garage ceiling accurately.
- Saw: A saw will be required to cut the ceiling panels to the appropriate size.
- Screwdriver or Drill: You'll need a screwdriver or drill to attach the ceiling panels to the ceiling joists.
- Screws or Nails: Depending on the type of ceiling panels you choose, you'll need screws or nails to secure them to the ceiling joists.
- Ladder: A ladder will be necessary to reach the ceiling and install the panels.
- Safety Gear: Don't forget to wear safety gear, such as safety glasses, gloves, and a dust mask, to protect yourself during the installation process.
Step 2: Measure Your Garage Ceiling
Once you have all the necessary materials, it's time to measure your garage ceiling. Use a measuring tape to measure the length and width of the ceiling. Make sure to measure from one end of the ceiling to the other, including any protrusions or alcoves. Write down the measurements so you can use them later when cutting the ceiling panels.
Step 3: Cut the Ceiling Panels
After measuring your garage ceiling, it's time to cut the ceiling panels to the appropriate size. Use a saw to cut the panels according to the measurements you took earlier. Make sure to cut the panels accurately to ensure a proper fit. If you're not comfortable cutting the panels yourself, you can have them cut at a hardware store or by a professional.


Step 4: Prepare the Ceiling Joists
Before installing the ceiling panels, you'll need to prepare the ceiling joists. Use a screwdriver or drill to attach furring strips to the ceiling joists. Furring strips are thin strips of wood or metal that provide a flat surface for the ceiling panels to attach to. Make sure to space the furring strips evenly across the ceiling joists, leaving enough room for the ceiling panels to fit between them.
Step 5: Install the Ceiling Panels
Once the ceiling joists are prepared, it's time to install the ceiling panels. Start by placing the first panel in one corner of the ceiling and aligning it with the furring strips. Use a screwdriver or drill to attach the panel to the furring strips using screws or nails. Make sure to secure the panel tightly to prevent it from sagging or coming loose.
Continue installing the remaining panels one by one, working your way across the ceiling. Make sure to align the panels carefully and secure them to the furring strips using screws or nails. If you need to cut a panel to fit around a protrusion or alcove, use a saw to make the necessary cuts.
Step 6: Finish the Installation
After installing all the ceiling panels, it's time to finish the installation. Use a caulking gun to apply caulk around the edges of the ceiling panels to seal any gaps or cracks. This will help prevent air and moisture from seeping through the ceiling and causing damage.
Once the caulk has dried, you can paint the ceiling panels to match the color of your garage walls. This will give your garage a finished look and make it more aesthetically pleasing.
Step 7: Maintenance and Care
Now that you've installed a fireproof ceiling in your garage, it's important to maintain and care for it properly. Here are some tips to help you keep your ceiling in good condition:
- Clean Regularly: Use a mild detergent and water to clean the ceiling panels regularly. This will help remove any dirt, dust, or debris that may accumulate on the surface of the panels.
- Inspect for Damage: Periodically inspect the ceiling panels for any signs of damage, such as cracks, holes, or sagging. If you notice any damage, repair it immediately to prevent further damage.
- Avoid Moisture: Keep the garage dry and well-ventilated to prevent moisture from accumulating on the ceiling panels. Moisture can cause the panels to warp, rot, or develop mold and mildew.
- Follow Manufacturer's Instructions: Make sure to follow the manufacturer's instructions for maintaining and caring for the ceiling panels. This will help ensure that the panels last for many years and provide the maximum level of fire protection.
Conclusion
Installing a fireproof ceiling in your garage is a great way to protect your home and family from potential fires. By following the steps outlined in this blog post, you can install a fireproof ceiling in your garage quickly and easily. Remember to choose the right ceiling panels for your garage's size and layout, measure accurately, cut the panels carefully, prepare the ceiling joists, install the panels securely, finish the installation properly, and maintain and care for the ceiling regularly.
If you have any questions or need further assistance with installing a fireproof ceiling in your garage, please don't hesitate to contact us. We're a leading supplier of fireproof ceilings and can provide you with the products and expertise you need to get the job done right. Let's work together to create a safe and secure garage for your home.
References
- "How to Install a Ceiling." Family Handyman.
- "Fireproofing Your Home." National Fire Protection Association.
- "Garage Safety Tips." Consumer Product Safety Commission.
Send Inquiry